
GitHub Blog 검색엔진 등록 & SEO 설정 - Google Search Console 연동
GitHub Pages에서 만든 Jekyll 블로그를 검색엔진에 노출시키기 위해서는
Google Search Console 등록과 sitemap, robots.txt, 그리고 SEO 메타태그 설정이 필요합니다.
이 포스트는 GitHub 블로그의 SEO 설정을 처음부터 끝까지 따라 할 수 있도록 구성된 실전 가이드입니다.
검색 엔진 개요
월드 와이드 웹 상에 존재하는 정보와 웹 사이트를 검색하기 위한 프로그램. 웹의 정보를 긁어오는 소프트웨어는 크롤러라고 부르고, 그 행위는 크롤링이라고 부른다. 참고로 일반 검색 엔진에 안 잡히는 웹을 딥 웹이라고 한다.
검색 엔진 종류
구글, 네이버, Bing, zum, 네이트, 다음… 여러가지가 있습니다.
Google Search Console
Google Search Console : https://search.google.com/search-console/welcome?utm_source=about-page
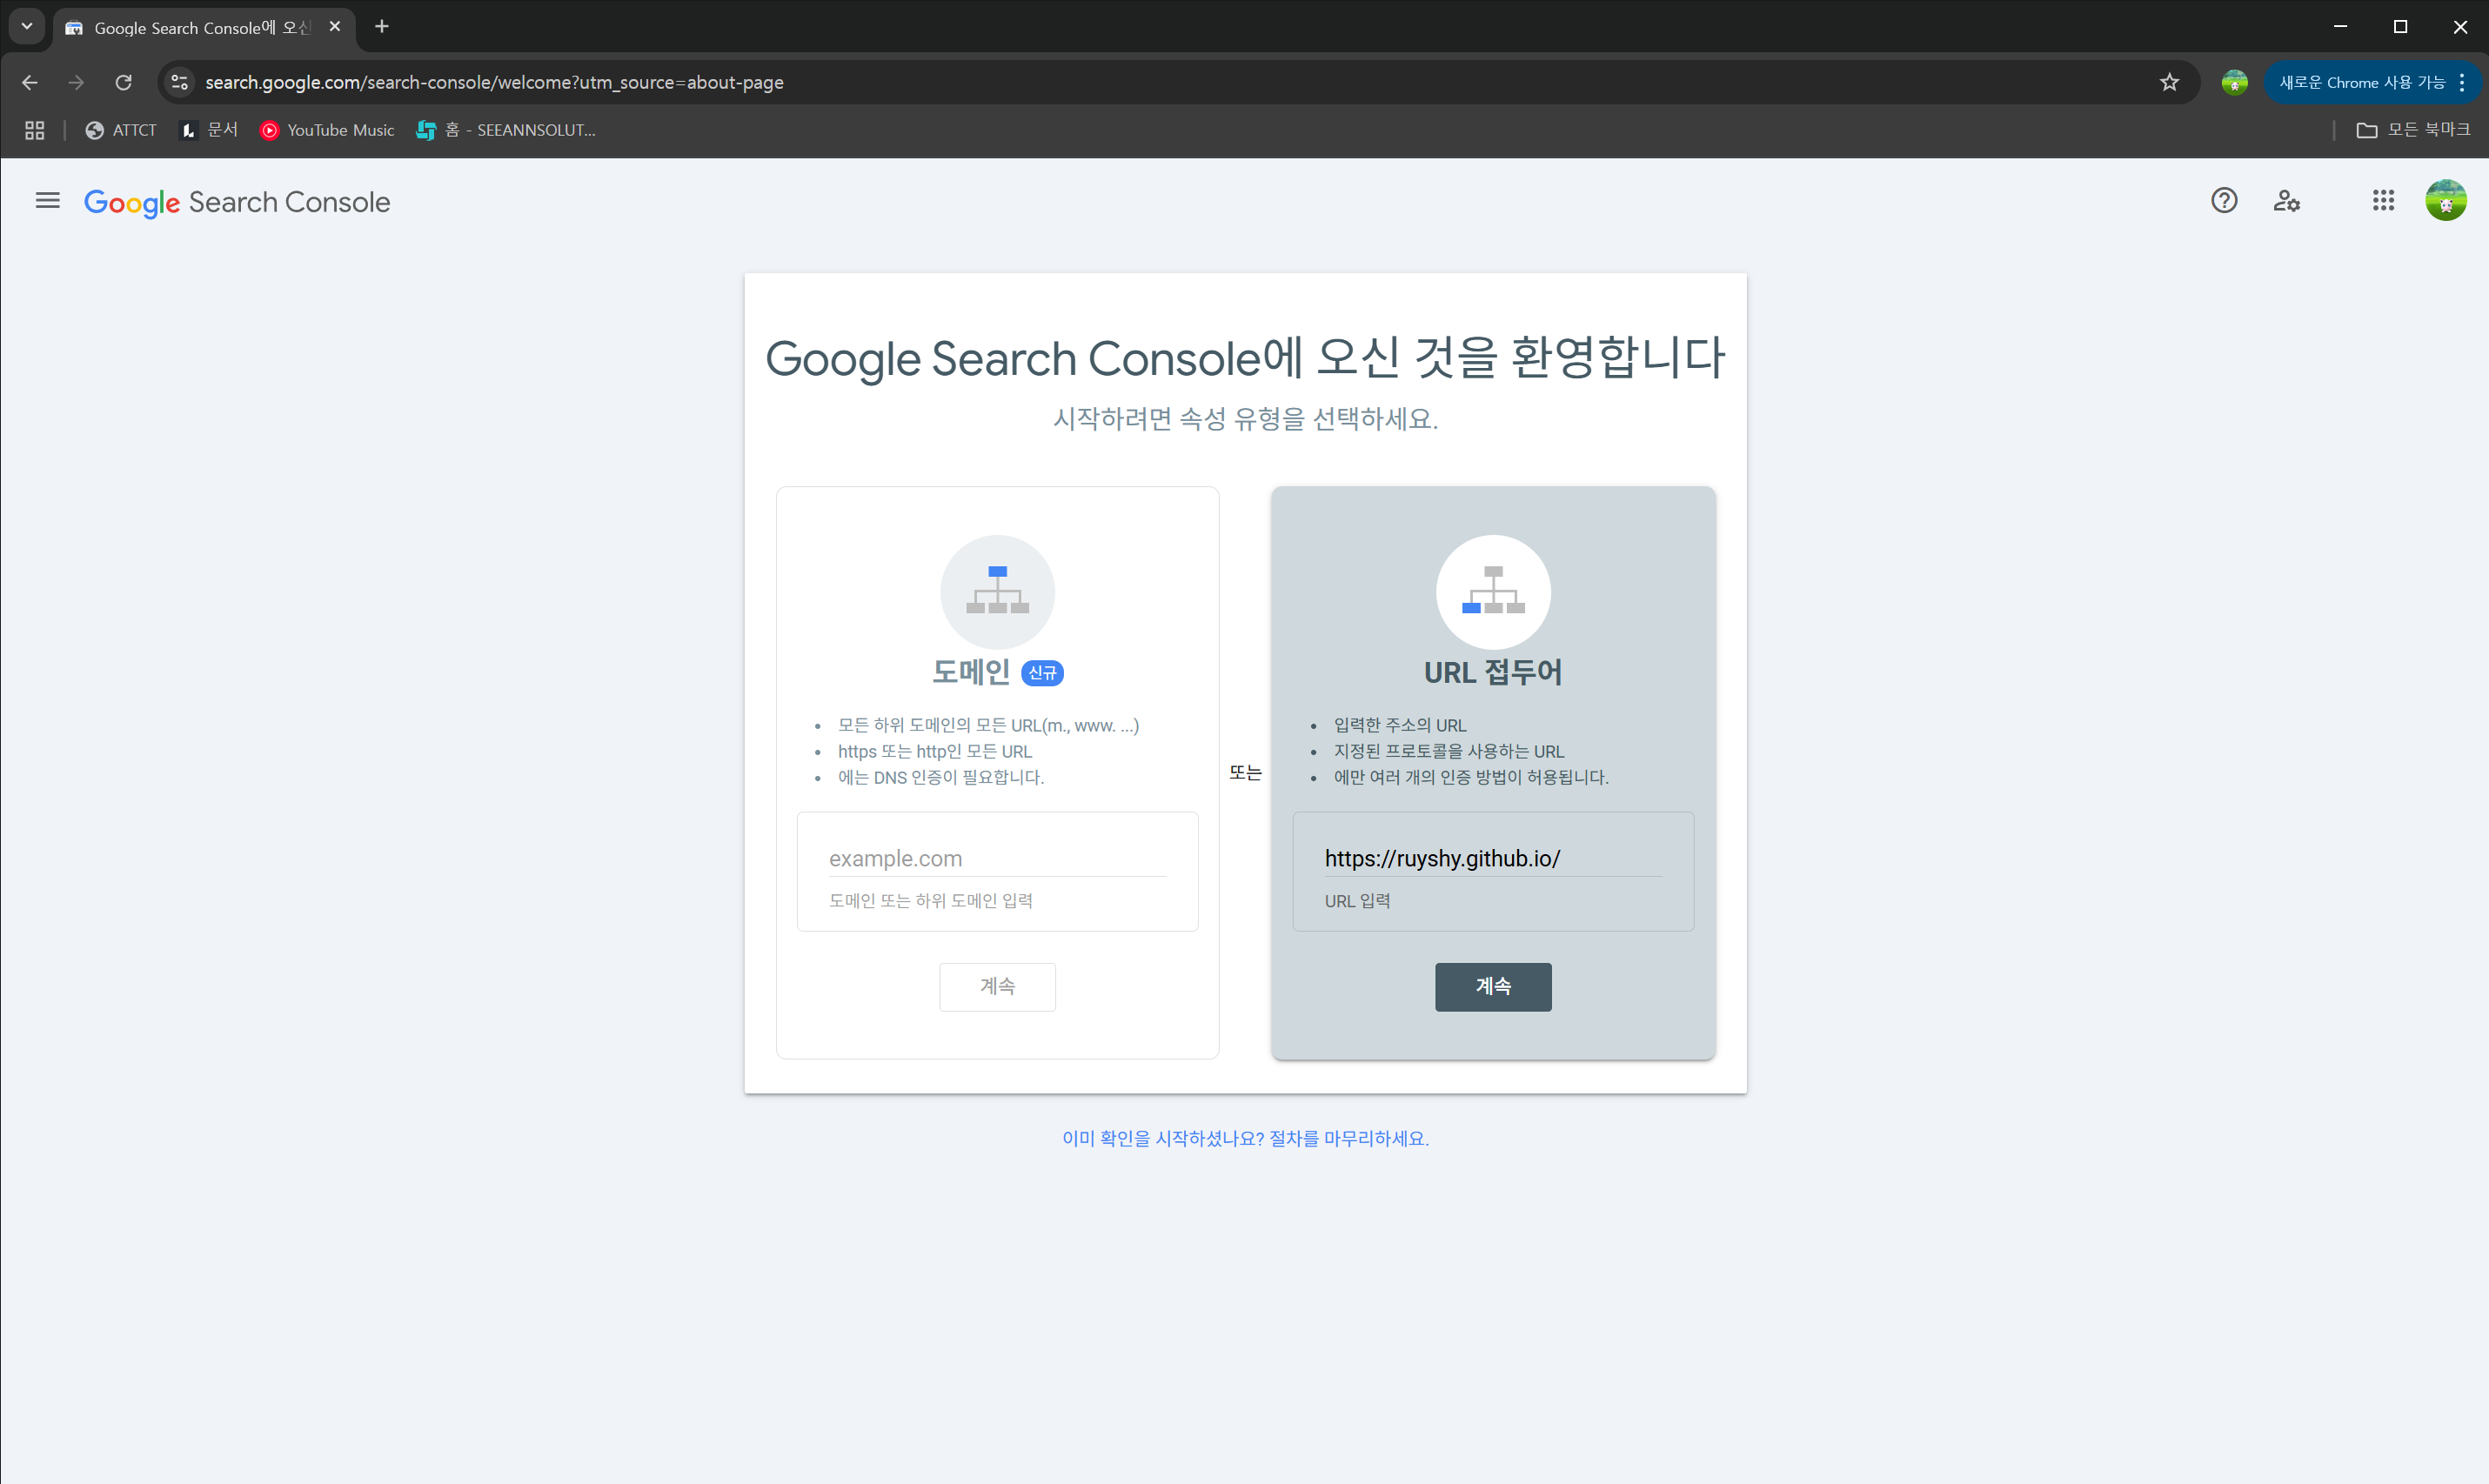
접속 후, URL 접두어에 자기 블로그 주소를 추가 후, 계숙을 눌러줍니다.
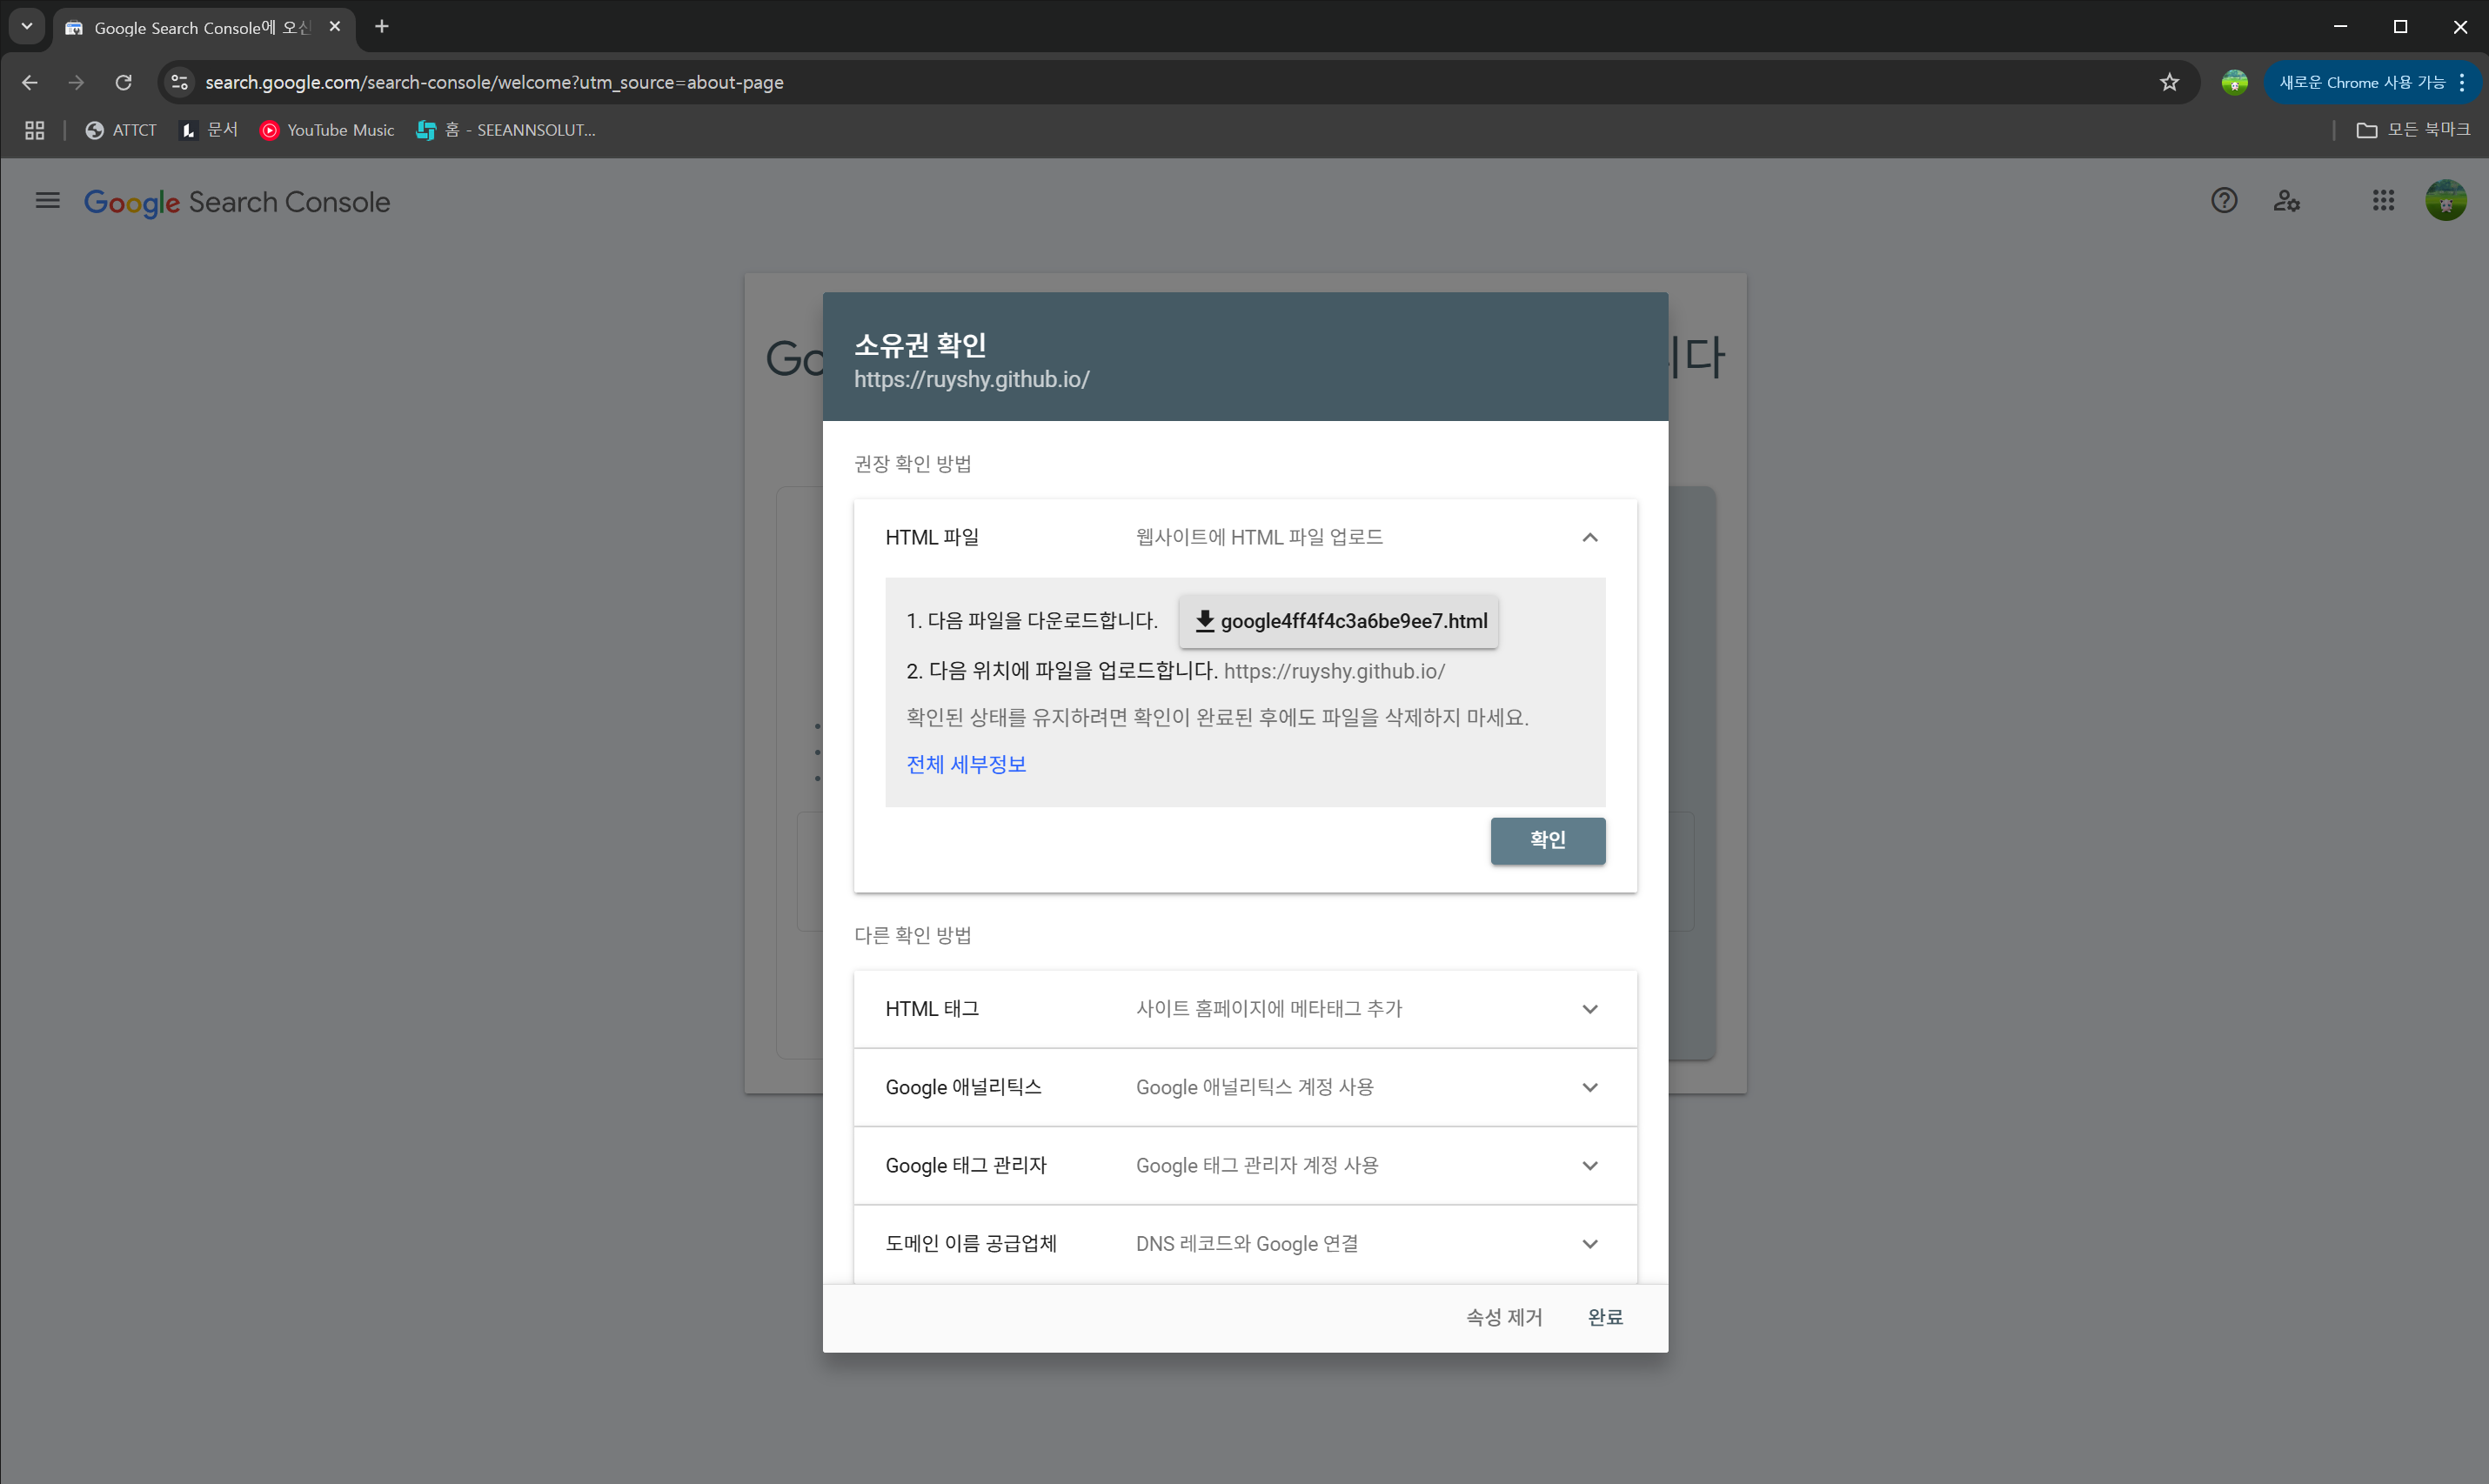
계숙 버튼을 눌러 진행을 하면 다음 화면이 나오는데, 파일을 다운로드 받고 다운 받은 파일을 깃허브 저장소 최상단 폴더에 넣어줍니다.

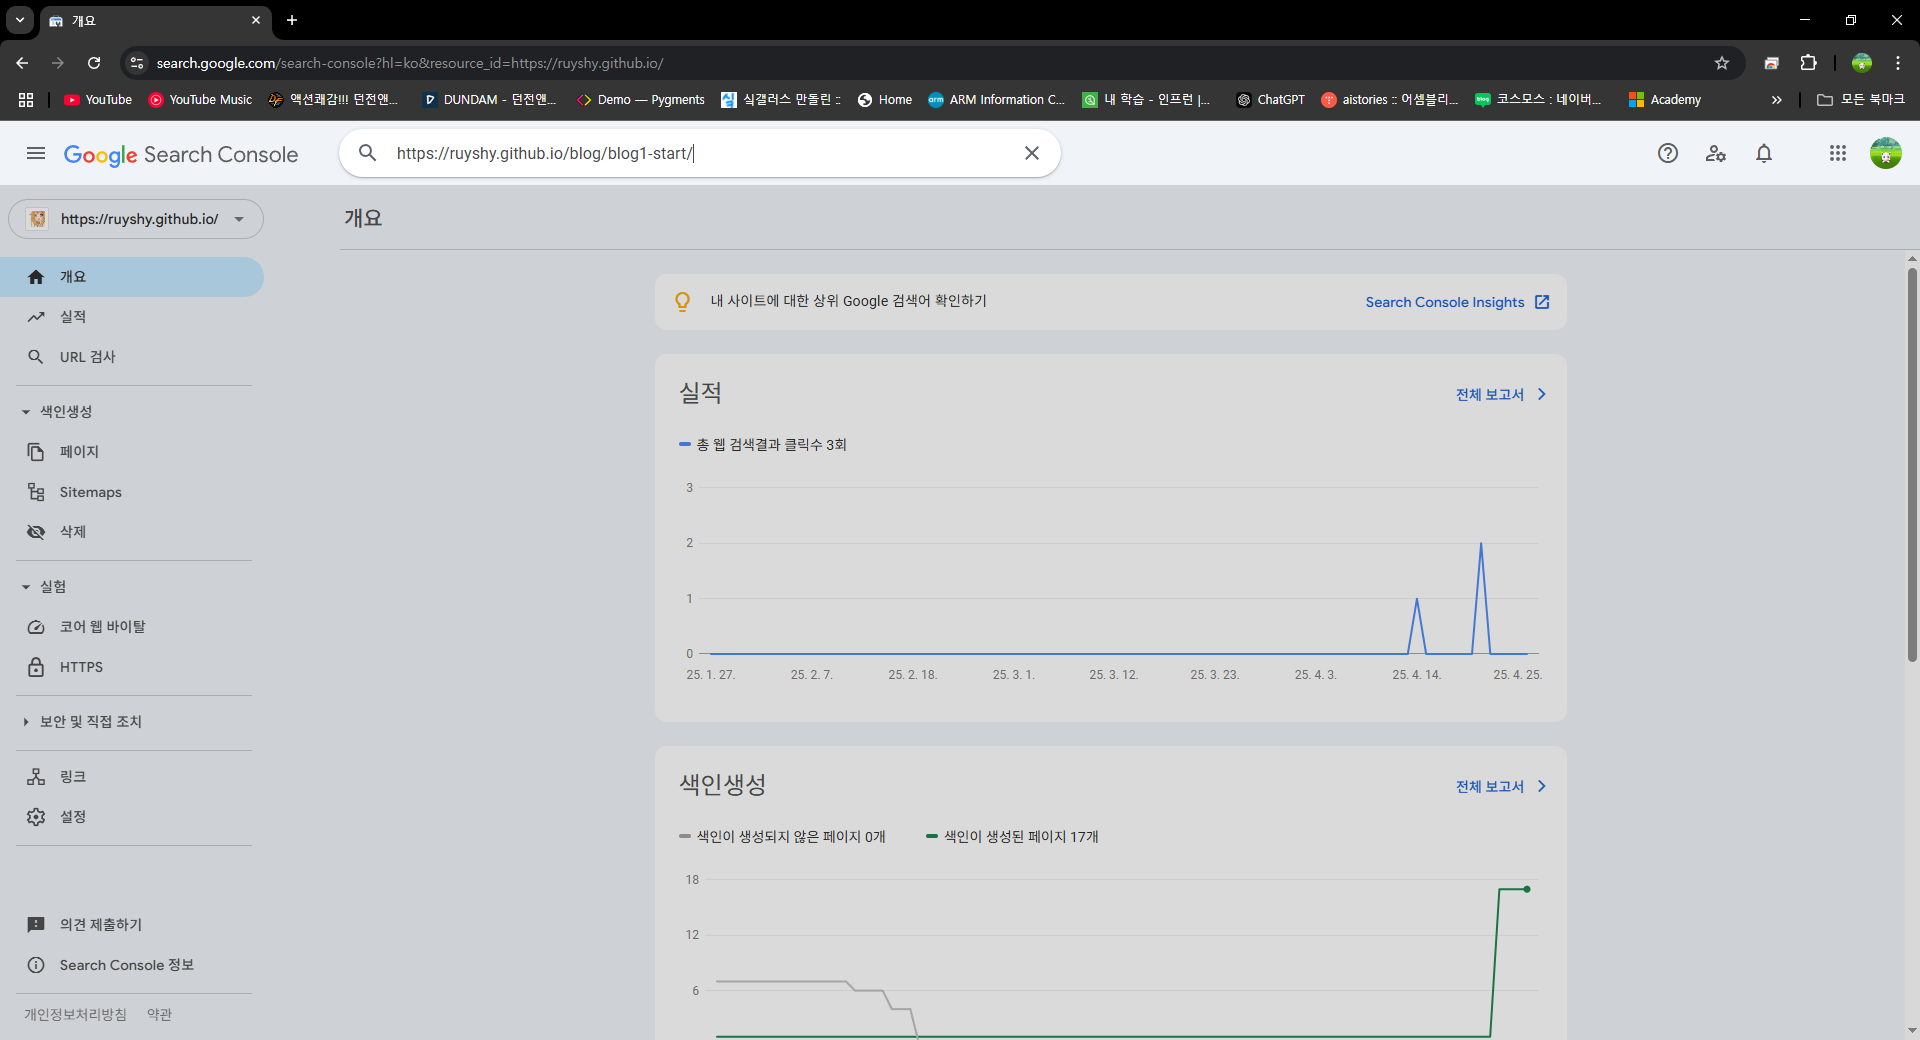
저장소에 push를 진행하고, 배포가 완료된 후, 확인 버튼을 눌러 진행하면 다음과 같이 창이 바뀌는데, 속성으로 이동을 눌러 설정을 해주도록 합시다.

Sitemap을 눌러 해당 설정 화면이 나오면 sitemap.xml을 추가해주는 작업을 진행해야 합니다. 저는 예전에 설정해둔 sitemap이 제출이 되어있긴하네요. 일단 진행해봅시다.
\sitemap.xml 생성
---
layout: null
---

<?xml version="1.0" encoding="UTF-8"?>
<urlset xmlns:xsi="http://www.w3.org/2001/XMLSchema-instance"
  xsi:schemaLocation="http://www.sitemaps.org/schemas/sitemap/0.9 http://www.sitemaps.org/schemas/sitemap/0.9/sitemap.xsd"
  xmlns="http://www.sitemaps.org/schemas/sitemap/0.9">
  {% for post in site.posts %}
    <url>
      <loc>{{ site.url }}{{ post.url }}</loc>
      {% if post.last_modified_at == null %}
        <lastmod>{{ post.date | date_to_xmlschema }}</lastmod>
      {% else %}
        <lastmod>{{ post.last_modified_at | date_to_xmlschema }}</lastmod>
      {% endif %}

      {% if post.sitemap.changefreq == null %}
        <changefreq>weekly</changefreq>
      {% else %}
        <changefreq>{{ post.sitemap.changefreq }}</changefreq>
      {% endif %}

      {% if post.sitemap.priority == null %}
          <priority>0.5</priority>
      {% else %}
        <priority>{{ post.sitemap.priority }}</priority>
      {% endif %}

    </url>
  {% endfor %}

</urlset>
작성 후, 깃허브 저장소에 push를 진행합니다.
깃허브 action으로 배포가 진행이 되었다면 새 사이트맵 제출을 해줍니다.
(sitemap.xml)

일단 성공적으로 제출이 진행 되었네요.
\robots.txt 생성
User-agent: *
Allow: /
Sitemap: https://ruyshy.github.io/sitemap.xml
robots.txt 생성 후, 깃허브 저장소에 push, 다시 사이트 맵을 제출해줍니다.

구글에 검색해보니 잘 보이는 듯 합니다.
포스트 색인 허용
포스트 최상단에 robots: index, follow 추가하기
포스트 전체 적용하기
_config.yml (일부분) :
defaults:
  - scope:
      path: ""
      type: pages
    values:
      author_profile: true
      sidebar:
        nav: "main"
  - scope:
      path: ""
      type: posts
    values:
      layout: single
      robots: index, follow
      author_profile: true
      toc: true
      toc_sticky: true
      comments: true
      share: true
      related: true
      sidebar:
        nav: "main"
robots: index, follow 해당 부분 추가하기
robots.txt로 전체 접근 허용했더라도,- 개별 포스트의
<meta name="robots">태그가 noindex면 색인 안 됨. - 즉,
robots.txt와robots: "index, follow"는 역할이 다름 → 둘 다 챙기는 게 안전
수동으로 인덱싱 요청하기
저의 경우 하위 사이트인 https://ruyshy.github.io/blog/blog1-start/ 을 입력한 곳에 색인 생성 요청할 사이트를 넣어주시면 됩니다.
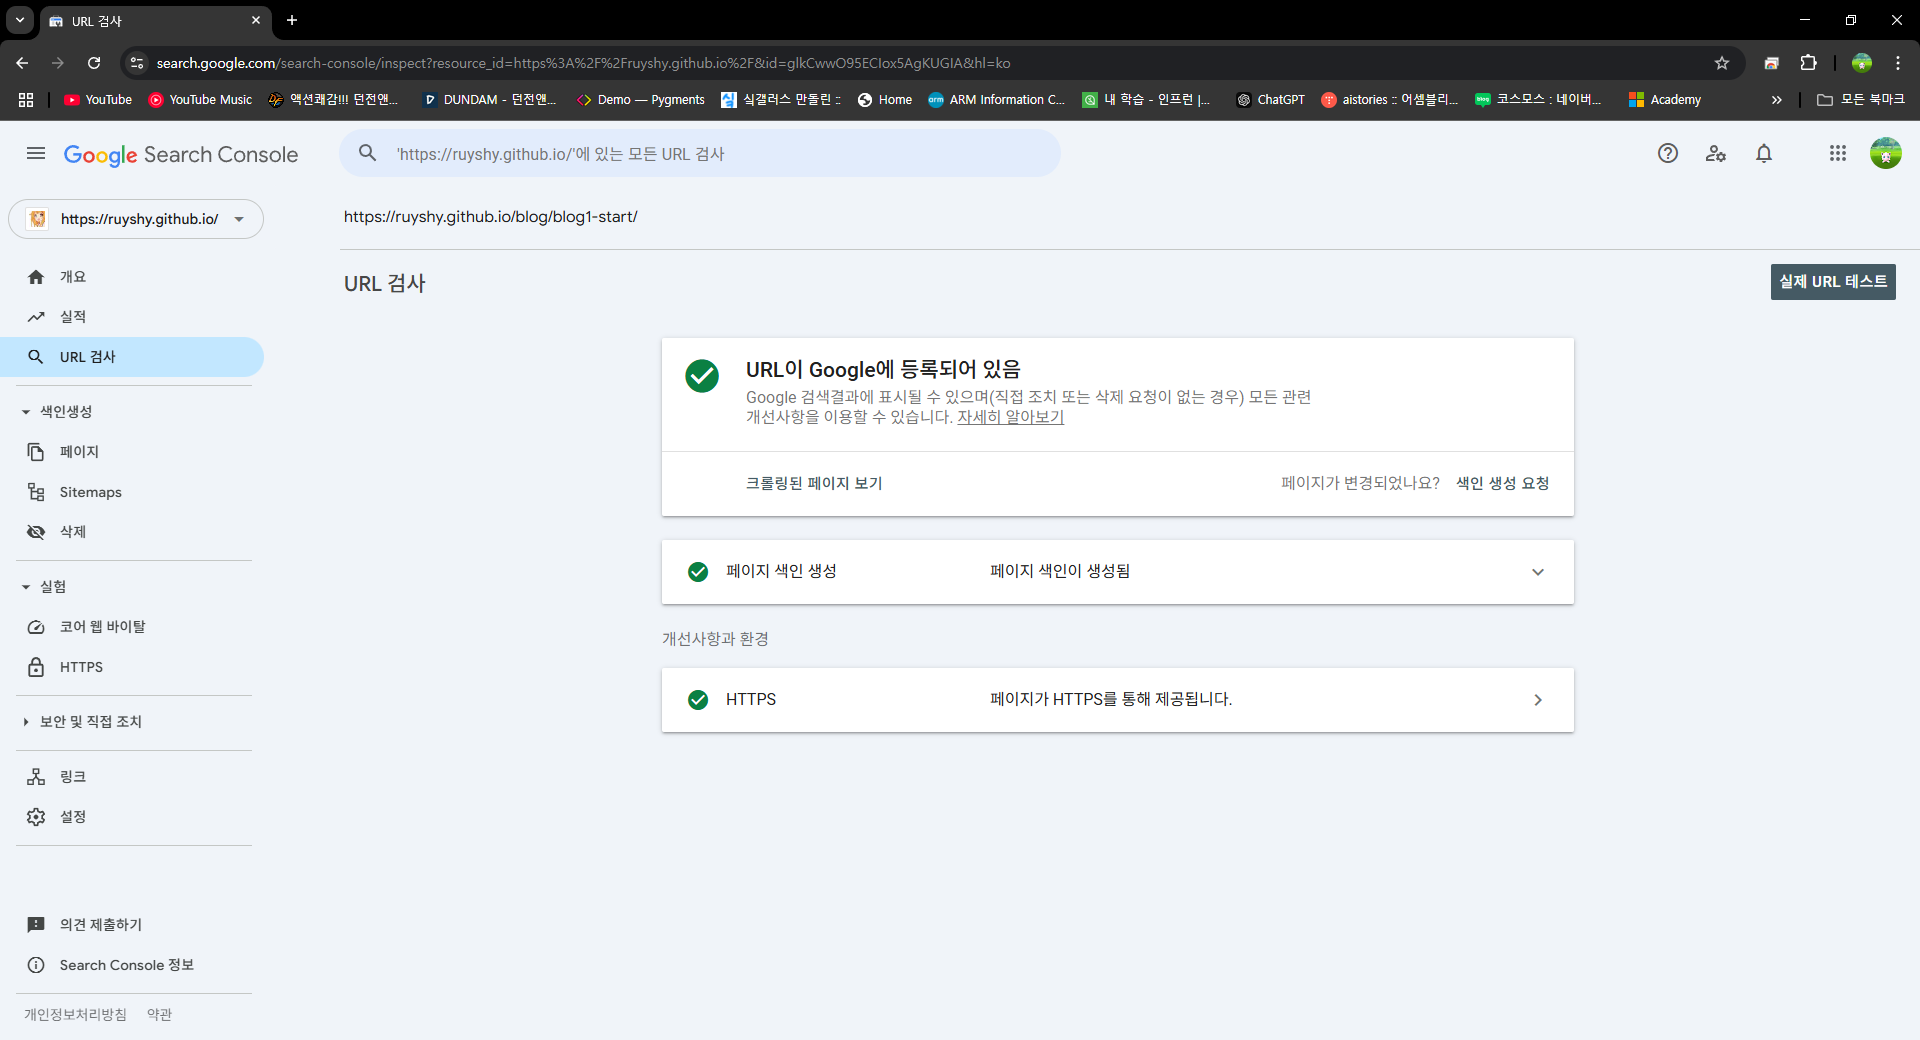
저는 예전에 색인 생성 요청을 완료를 진행해서 등록되어있는 사진입니다.
- 상단 검색창에 다음 입력 후 Enter
- “요청되지 않음” → “색인 생성 요청” 버튼 클릭
- blog2, blog3, … 반복
실제로 인덱싱되면 24시간 내에 검색에 나타나기 시작
저의 경우 하위 사이트 목록
예시:
https://ruyshy.github.io/blog/blog1-start/
https://ruyshy.github.io/blog/blog2-local-server/
https://ruyshy.github.io/blog/blog3-build-release/
https://ruyshy.github.io/blog/blog4-category/
https://ruyshy.github.io/blog/blog5-post-image/
https://ruyshy.github.io/blog/blog6-comment/
https://ruyshy.github.io/blog/blog7-font/
https://ruyshy.github.io/blog/blog8-toc/
https://ruyshy.github.io/blog/blog9-Image-plugin/
https://ruyshy.github.io/blog/blog10-code-block-copy-button/
https://ruyshy.github.io/blog/blog11-search-engine/
https://ruyshy.github.io/blog/blog12-toggle-plugin/
수동으로 해당 리스트들을 등록했습니다.
jekyll-seo-tag 사용
_config.yml plugin: 내용 추가
` - jekyll-seo-tag` 추가하기
# Plugins (previously gems:)
plugins:
  - jekyll-paginate
  - jekyll-sitemap
  - jekyll-seo-tag
  - jekyll-gist
  - jekyll-feed
  - jekyll-include-cache

# mimic GitHub Pages with --safe
whitelist:
  - jekyll-paginate
  - jekyll-sitemap
  - jekyll-seo-tag
  - jekyll-gist
  - jekyll-feed
  - jekyll-include-cache
Gemfile 내용 추가
gem "jekyll-seo-tag" 추가
# Gemfile
source "https://rubygems.org"

gem "jekyll", "~> 4.3.2"
gem "minimal-mistakes-jekyll"
gem "jekyll-paginate"
gem "jekyll-sitemap"
gem "jekyll-seo-tag"
gem "jekyll-feed"
gem "jekyll-include-cache"
gem "jekyll-gist"
gem "tzinfo"
gem "tzinfo-data"
추가 진행 후
cmd 에서 해당 명령어 입력
bundle install
추가 소유권 인증 방법2
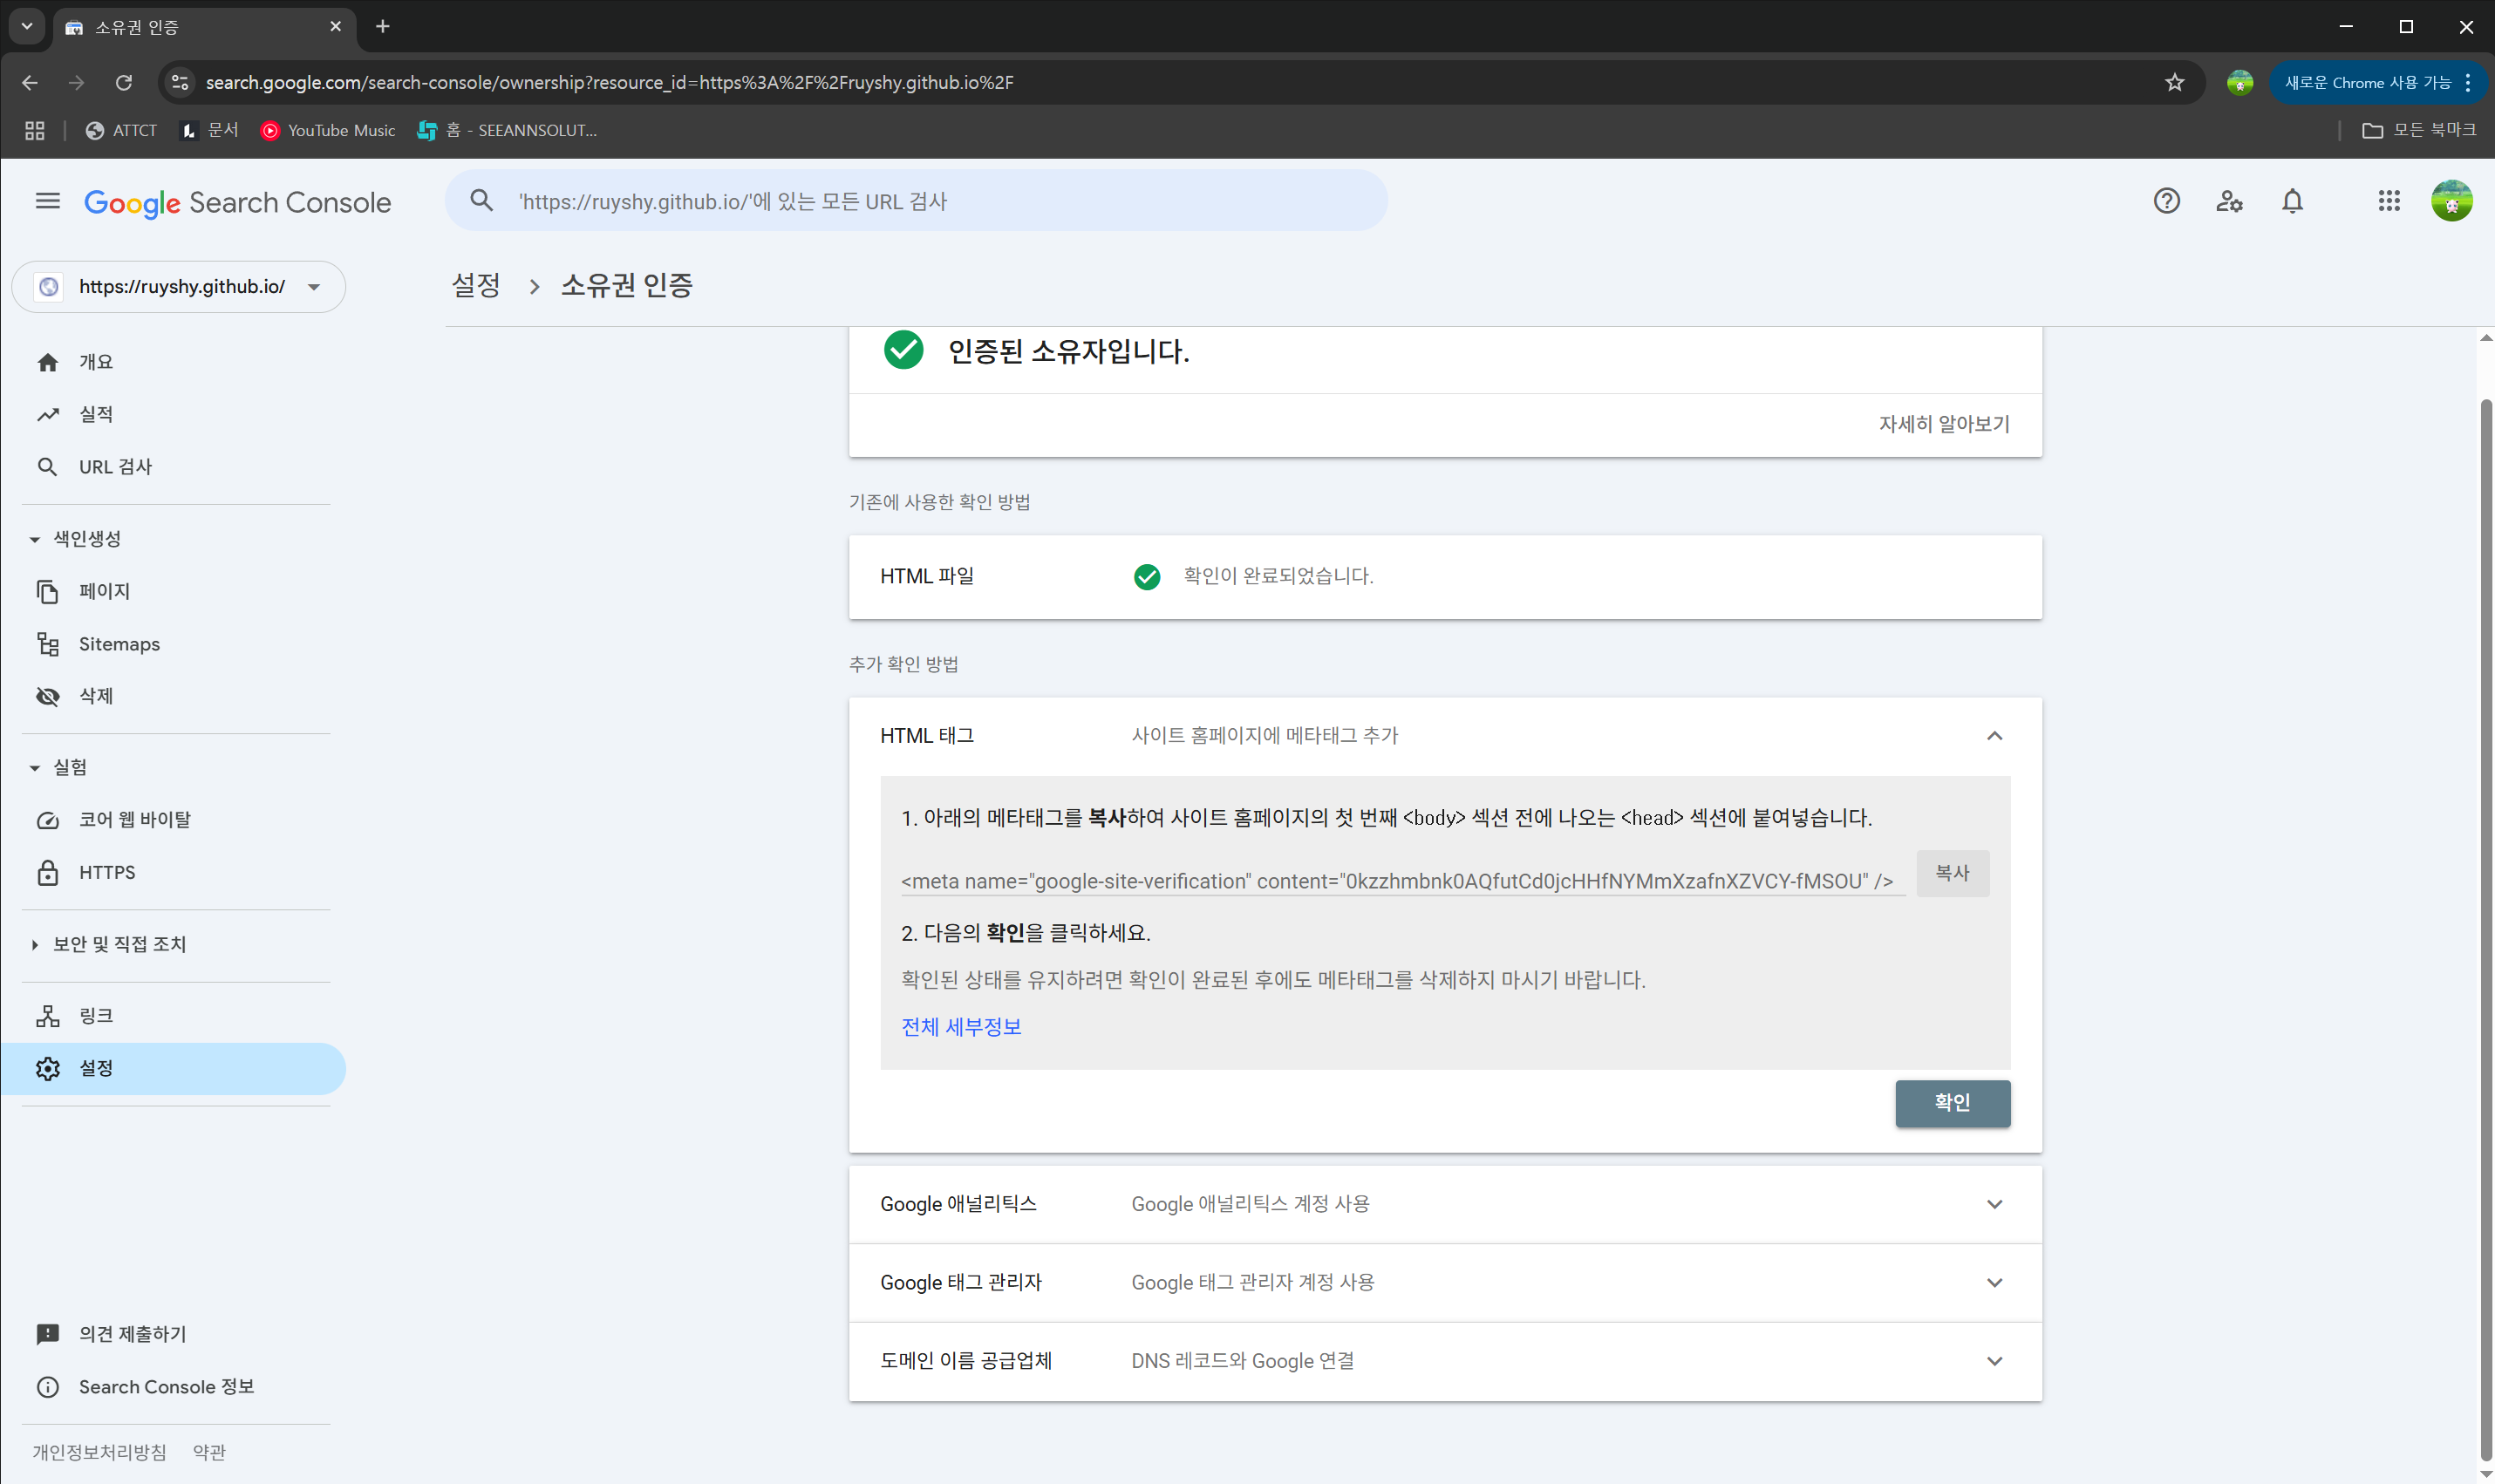
설정 → 소유권 인증 으로 들어가보면 HTML 태그가 있습니다.
<meta
  name="google-site-verification"
  content="0kzzhmbnk0AQfutCd0jcHHfNYMmXzafnXZVCY-fMSOU"
/>
content 안에 있는 내용을 복사한 뒤, _config.yml 에서 google-site-verification: 해당 부분을 찾습니다.
google_site_verification: 0kzzhmbnk0AQfutCd0jcHHfNYMmXzafnXZVCY-fMSOU
위와 같이 content에 있는 내용을 추가해줍니다. 추가 후, 깃허브 저장소에 push 진행 → 확인을 눌러 진행.

인증이 완료되었네요! 굿굿
Leave a comment